
Material intelligence / Field guide
Retail Feature Wall Design: Balancing Brand Identity and Replaceable Panels
Design the opening-day impression and the first future replacement together, from display rhythm to panel access.
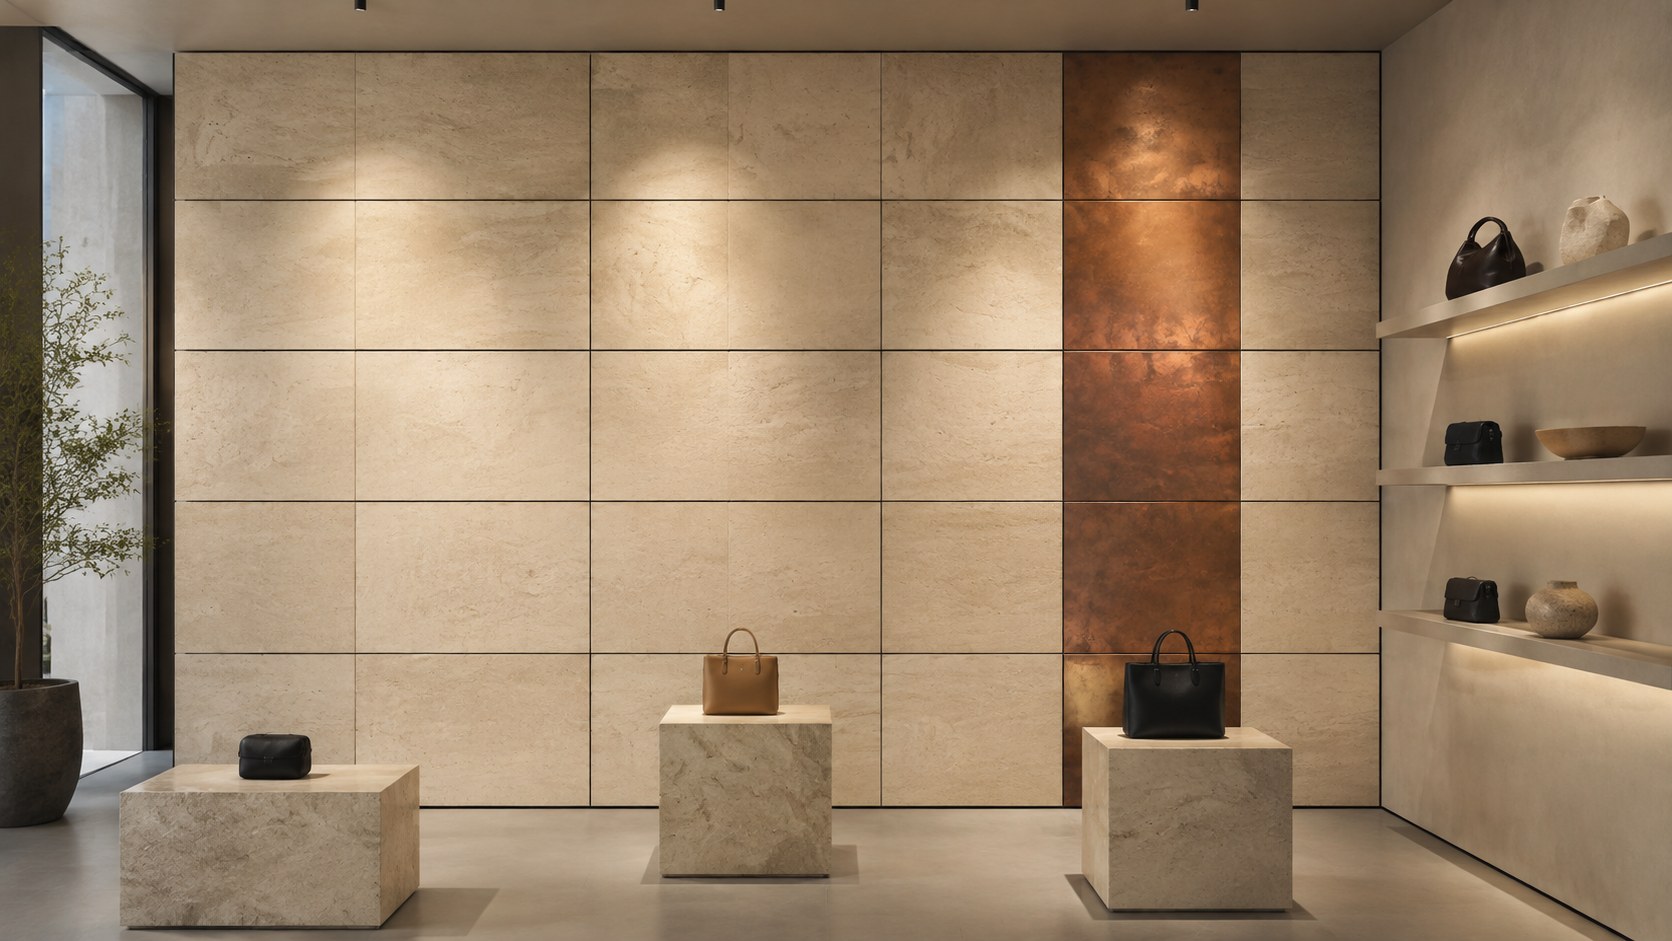
The opening-day render shows an uninterrupted feature wall, a centered brand sign and carefully lit merchandise. Six months later, a display bracket moves. A panel is damaged during a campaign change, and the only way to reach its fixings is to remove the sign and several neighbouring panels.
Retail feature wall design should account for that second scene as well as the first. A useful wall expresses the brand, supports the display strategy and has a realistic plan for change. Replaceability is a property of the coordinated assembly, not a benefit that follows automatically from dividing the wall into panels.
At a glance
Balance identity and maintenance by separating the elements that should remain stable from those expected to change. Coordinate panel boundaries, lighting, fixtures and attachment so the intended replacement unit can actually be removed and reinstated.
- Choose a few clear surface signals for the brand rather than asking every panel to carry equal visual emphasis.
- Distinguish a removable panel from a readily replaceable finish: access, spares and matching matter too.
- Demonstrate a representative replacement in the mock-up before approving the detail.
What should stay recognizable when the display changes?
Begin with the role of the wall in the customer journey. Is it the first view from the entrance, a backdrop for a product range or a close-contact surface at checkout? Identify the viewing distance and the merchandise it should support. Deep relief may read strongly from the entrance while a quieter finish gives a small product more visual space.
Translate brand direction into a short set of material decisions: warm or cool tone, fine or coarse texture, matte or reflective appearance, and a controlled pattern rhythm. Use those choices consistently, but avoid assuming that a brand colour on paper will produce the same effect on a textured or metallic surface.
Separate three layers in the design brief: a stable architectural background, changeable merchandising elements and replaceable service or damage-prone areas. These layers can share a palette while following different replacement cycles. That distinction helps prevent a seasonal display change from becoming a full-wall refurbishment.

For example, a restrained mineral-like background could remain while display graphics change within designated bays. A reflective accent might be concentrated at the brand sign instead of covering every product backdrop. These are design options, not claims that one material will suit every store or lighting condition.
Explore the five decorative surface types by construction as well as appearance. A thin facing bonded to a board and a deep molded panel can require different edge, fixing and replacement strategies even when both are selected for a stone-like expression.
How do panel joints become part of the elevation?
Lay out the panel grid alongside signage, shelving, lighting and access requirements. Treat joints as design elements with a purpose: aligned with display bays, held as a consistent rhythm or placed where visual interruption is acceptable. A joint hidden in the first render may become conspicuous when the merchandise changes.
Distinguish the visible joint from the removal clearance. A narrow reveal can look refined but may not provide the movement needed by the selected mounting system. Conversely, a lift-off panel can require free space above it that disappears when a sign or shelf is installed. The attachment supplier's actual geometry must inform the detail.

Draw penetrations and fixtures at panel scale. A bracket crossing a panel boundary can prevent individual removal. A cable routed through a small unplanned opening can tether an otherwise demountable panel. Give electrical and display teams a coordinated elevation early enough for their decisions to fit the panel logic.
Keep the support of merchandise and signage explicit. A decorative facing should not be assumed to carry fixture loads. Coordinate independent support or a verified integrated system, and ensure the chosen arrangement remains accessible for maintenance. The visual continuity of the finished wall should not conceal uncertainty about what supports the display.
What makes a panel replaceable in practice?
Start with the intended replacement unit. Is the owner expected to replace one face sheet, one complete backed panel or a larger coordinated bay? Define the procedure in that same unit. A thin finish may need to be supplied already bonded to a carrier if on-site refinishing would be impractical, but that is a project-specific decision.
Purpose-designed demountable systems exist. Fastmount's technical guide describes panel mounting options intended for removal and access. This is an example of the mounting-system category, not an approval for a particular Versa panel. Actual compatibility, panel construction, weight, clip selection, fixing positions and supporting material still require verification.

Ask four practical questions: can the operator reach the release point, move the panel in the required direction, handle it safely in the available space, and reinstall it without damaging the finish or neighbouring pieces? Include the tools and personnel required by the selected system. If fixtures must be removed first, document that sequence instead of calling the panel independently replaceable.
A permanently bonded assembly may still be appropriate in a protected location where infrequent replacement is accepted. Be clear about the trade-off: replacement may involve removing adhesive, repairing the substrate and reinstating the finish. Do not describe a destructive removal process as simple panel access.
Spares are a separate issue. Record panel dimensions, finish revision, orientation and position so a stored spare can be matched to the intended location. Discuss storage conditions and later batch differences with the supplier. Keeping spare material does not guarantee an invisible match after the installed wall has changed through use, light exposure or cleaning.
How should lighting and cleaning influence the finish?
Review the surface with representative merchandise and the proposed lighting direction. A metallic or gilded finish can pick up strong highlights; relief can cast shadows across adjacent products. Test the intended effect from entry, browsing and close viewing positions rather than approving a sample only on a design-studio table.
Use the final protected finish in the review. Our gilding process guide explains why the prepared ground, leaf and protective treatment all contribute to appearance. The same discipline applies when comparing other coating systems: the approved sample should represent what will actually be installed.
Discuss cleaning with the retail operator. Identify likely fingerprints, trolley contact and display-change handling, then request compatible care guidance and an appropriate trial where needed. Avoid choosing a cleaning product based only on the face's resemblance to stone or metal; its real coating and construction determine compatibility.
A retail feature wall review sheet
Use this checklist in the design coordination meeting. Each answer should correspond to an elevation, detail, sample or maintenance instruction that the team can refer to later.
| Decision | Question to resolve | Review evidence |
|---|---|---|
| Brand role | What must remain recognizable between campaigns? | Material palette and key sightlines |
| Panel grid | Do joints fit the display and sign positions? | Coordinated elevation |
| Fixture support | What receives the merchandise and signage loads? | Verified support detail |
| Replacement unit | Face, whole panel or complete bay? | Defined replacement scope |
| Access path | Can the panel move without obstruction? | Removal sequence in mock-up |
| Lighting | Do glare and shadows help the display? | Review under representative lights |
| Finish range | What variation is accepted across the wall? | Labelled physical samples |
| Spares and care | How will damaged pieces be identified and replaced? | Panel schedule and care record |

The mock-up should include a neighbouring joint, a fixture or sign interface and a representative termination. After reviewing the appearance, remove and reinstall the agreed replacement unit. Record whether tools can reach, the movement path remains clear and the finish survives the operation as required. Update the detail if the demonstration reveals dependencies the drawings missed.
Questions designers often ask
Does every panel need to be demountable?
No. Prioritize areas with service access, anticipated display changes or a realistic damage risk. Different wall zones can have different replacement strategies if their interfaces and maintenance instructions remain clear.
Can matching spares be ordered later?
Possibly, but availability and finish matching must be discussed with the supplier. Retain the original product and finish references, and agree an appropriate initial spare strategy instead of assuming indefinite identical supply.
Will visible panel joints weaken the brand expression?
Not necessarily. A deliberate grid can reinforce proportion and display rhythm. The problem is an uncoordinated joint, especially one that conflicts with signage, lighting or a required removal path.
Plan the first refresh before the first installation
Share the store elevation, display-change expectations, lighting direction and the areas that need access or replacement. Review Versa surface options and discuss a project sample that includes the relevant joint. Use the wall panel specification checklist to retain the decisions for procurement and handover.
Considering this surface for your project?
Tell us about your space, desired finish and project requirements. Let’s discuss material options, samples and detailing.
Discuss Your Project Request Samples