
Material intelligence / Field guide
How PU Stone Panels Are Molded: What Shapes the Finished Texture?
Follow the surface from master relief to finished panel, and identify the variables worth reviewing in a wall-scale sample.
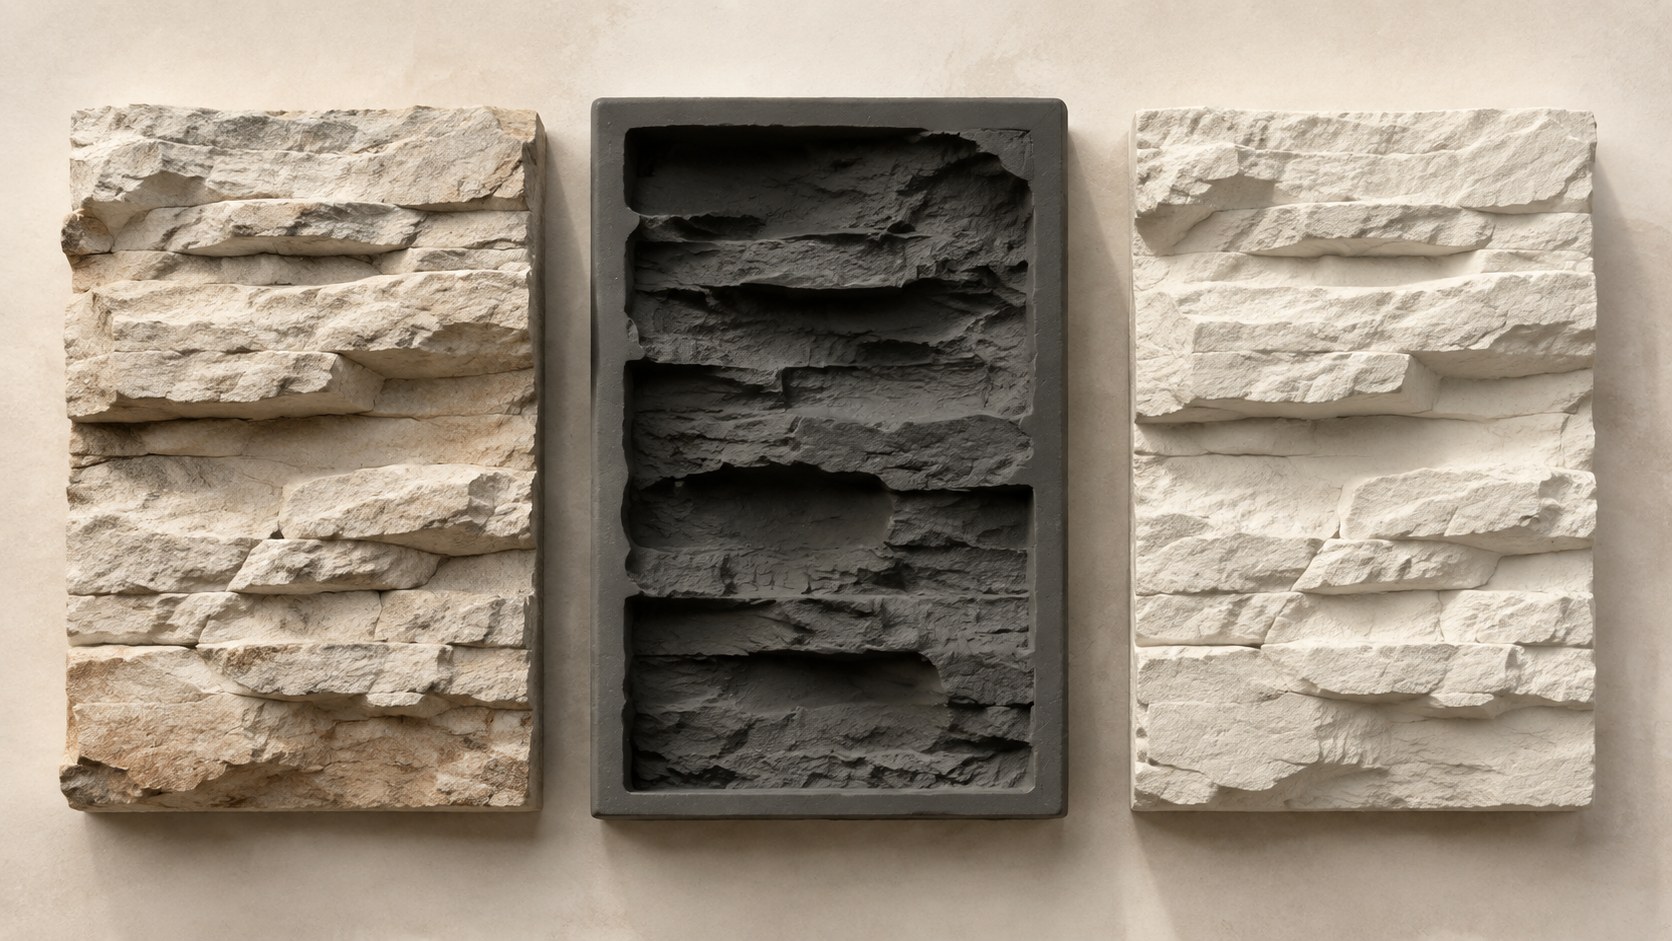
A small PU Stone sample shows convincing cracks and ledges. Across a full feature wall, however, the same ridge appears again and again, while the edge between panels catches the light. The texture may be accurately reproduced and still need a better wall-scale layout.
The PU stone panel manufacturing process connects several decisions: the original relief, the mold, how the foam reproduces it, the condition of the demolded panel and the decorative finish. Understanding those decisions helps a designer ask for a more useful sample. This article describes general manufacturing principles, not a disclosed recipe, production audit or verified line configuration for a particular Versa model.
At a glance
PU Stone panels obtain their three-dimensional texture by reproducing a master surface in a mold, then presenting that relief through a finished coating system. The mold establishes geometry; casting quality preserves it; colour, sheen, joints and lighting determine how it reads on the wall.
- A detailed mold cannot compensate for an unsuitable repeat pattern or poorly coordinated edges.
- Surface colour and physical relief are separate variables and should be reviewed separately.
- Approve several finished panels together, including the intended joint and corner treatment.
How does the master become a repeatable surface?
The master is the original surface from which a mold is made. It can be developed from a selected stone-like reference or sculpted relief. Its large forms establish the rhythm of ledges and recesses; smaller features give close-range texture. Ask which part of that geometry is repeated within a panel and across the available panel set.
A mold captures a negative of the master. Material formed against that surface produces the corresponding positive relief. The article's diagrams simplify this relationship: they do not show a specific factory tool or prove the geometry of an available SKU.

Think about viewing scale before requesting maximum texture detail. A fine grain may contribute very little from the opposite side of a lobby, while one prominent fissure can dominate a short wall. For the designer, the useful question is not simply “How realistic is the sample?” but “Which features remain visible at the distances that matter?”
Discuss repeat options early. Distinct molds, permitted panel orientations and a considered layout can change repetition, but none should be assumed from a catalogue photograph. Ask for a numbered set of full-face images or an actual multi-panel arrangement that identifies repeated motifs. Do not rotate a panel if its edge profile or directional surface prevents that use.
What happens when polyurethane foam fills the mold?
Rigid polyurethane casting systems use reactive components that form and expand within a controlled process. The resulting panel body is a foam, not a piece of quarried stone. Formulation and processing conditions belong to the material manufacturer's instructions and the factory's qualified process; they are not settings an interior designer should infer from appearance.
Polytek's PolyFoam R-2 documentation provides a useful example: it describes a two-part rigid casting foam and distinguishes free-rise density from a molded density range used to obtain detail and mold fill. Those product-specific values are not Versa panel specifications. The general lesson is that an unrestricted foam rise and a finished molded object are different conditions.

For a design review, focus on the outcome at the face, recesses and edges. Ask the supplier to explain how incomplete detail, surface voids, distortion and edge defects are assessed against an approved reference. One attractive small sample does not show consistency across the full panel or across production.
Separate density from broad quality claims. Density can be relevant to a formulation and product specification, but a higher number alone does not establish better colour, sharper detail, greater fire performance or a more suitable installation. Request the actual properties and evidence needed for the project instead of using density as a universal quality score.
Release and demolding affect the next stage
The cast part needs to separate from the mold without unacceptable damage. Tool material, release system and process timing can influence that step. Polytek's discussion of casting foam in polyurethane molds also explains why release residues can interfere with subsequent paint adhesion and describes a particular mold treatment solution. That is a manufacturer example, not an instruction to copy its products into an unidentified production line.
Ask how the supplier prepares the surface for finishing and how cut or trimmed areas are treated. A panel face can look complete while its edge exposes a different colour or texture. This becomes important around outlets, small infill pieces and outside corners.
Why does finishing change the apparent texture?
Relief creates the physical light-and-shadow pattern. Colour and sheen change the emphasis. A darker treatment in recesses can make them read as deeper; a reflective highlight can make a ridge seem sharper. The same molded geometry can therefore produce noticeably different finished expressions.
Review an uncoated reference or process-stage image when the supplier can provide one, alongside the finished sample. This helps distinguish the shape being approved from the effect of the decorative coating. Do not assume that a colour revision leaves the perceived texture unchanged, especially where dark recesses or bright highlights form a major part of the visual character.

Evaluate the finish in diffuse and directional light. Diffuse light helps compare overall colour; grazing light reveals relief, joint shadows and surface irregularities. Match the intended viewing orientation. A panel photographed horizontally on a bench can look different after installation on a vertical wall under a ceiling-mounted spotlight.
Ask for the finish system and care information relevant to the selected model. A stone-like appearance does not establish exterior suitability, scratch resistance or tolerance of cleaning chemicals. Those are product and assembly questions requiring appropriate evidence, not conclusions that can be drawn from the molding process.
What should designers approve before production?
Use a review set that connects sample identity to the wall elevation. Include a representative full panel, adjacent panels and the intended edge or corner detail. If custom colour or texture is proposed, distinguish development samples from the final approved reference and record which version has been released.
| Review item | What to look for | Useful supplier response |
|---|---|---|
| Master and relief | Dominant motif, recesses, large-scale rhythm | Identified texture reference |
| Repeat set | Recognizable features across adjacent panels | Numbered layout and available variants |
| Face quality | Incomplete features, voids or unintended marks | Acceptance examples and inspection method |
| Panel geometry | Edge alignment and fit at the joint | Verified dimensions and tolerances |
| Coating | Colour range, sheen and recess treatment | Labelled finished approval samples |
| Cuts and corners | Exposed body and finish continuity | Proposed detail and touch-up guidance |
| Batch record | Traceability between sample and supply | Finish revision and production identification |

Avoid specifying “no variation” if controlled variation is part of the finish. Instead, identify acceptable range samples and unacceptable departures. Equally, “hand-finished” should not become an explanation for any result whatsoever. The review should describe which differences belong to the intended surface and which require correction.
Retain the approval references through delivery. Compare incoming panels against the agreed range before installing them, and resolve visible departures while individual pieces remain accessible. Keep the approved layout and batch identification with the installation record so later replacements can be discussed precisely.
Questions designers often ask
Does a new colour require a new mold?
Not necessarily. Colour may be changed through the finish system while retaining the relief, but the supplier must confirm what is feasible for the specific product. A change in geometry or edge configuration is a different development request.
Can molding eliminate visible panel joints?
A mold can incorporate edge geometry, but joint appearance also depends on set-out, fit, attachment and finishing. Assess a real adjacent-panel detail rather than accepting a joint-free close-up as proof of the installed result.
Is molded PU Stone the same as manufactured cement stone?
No. They can share a stone-like appearance while using different body materials and production routes. Our PU Stone versus natural stone guide also explains why appearance should be separated from installed-system requirements.
Bring a texture reference and a wall layout
For a useful discussion, send the visual reference, wall dimensions, viewing distance, lighting direction and intended corner treatment. Explore PU Stone Panels, then request a sample review that connects the finish to the actual wall. Use the specification checklist to record the accepted product and detail together.
Considering this surface for your project?
Compare surface options, samples and detailing for your stone-look wall.
Discuss Your Project Request Samples